Miscellaneous Features
This section documents some of the lesser used features included in Dynasend:
Digital Business Cards
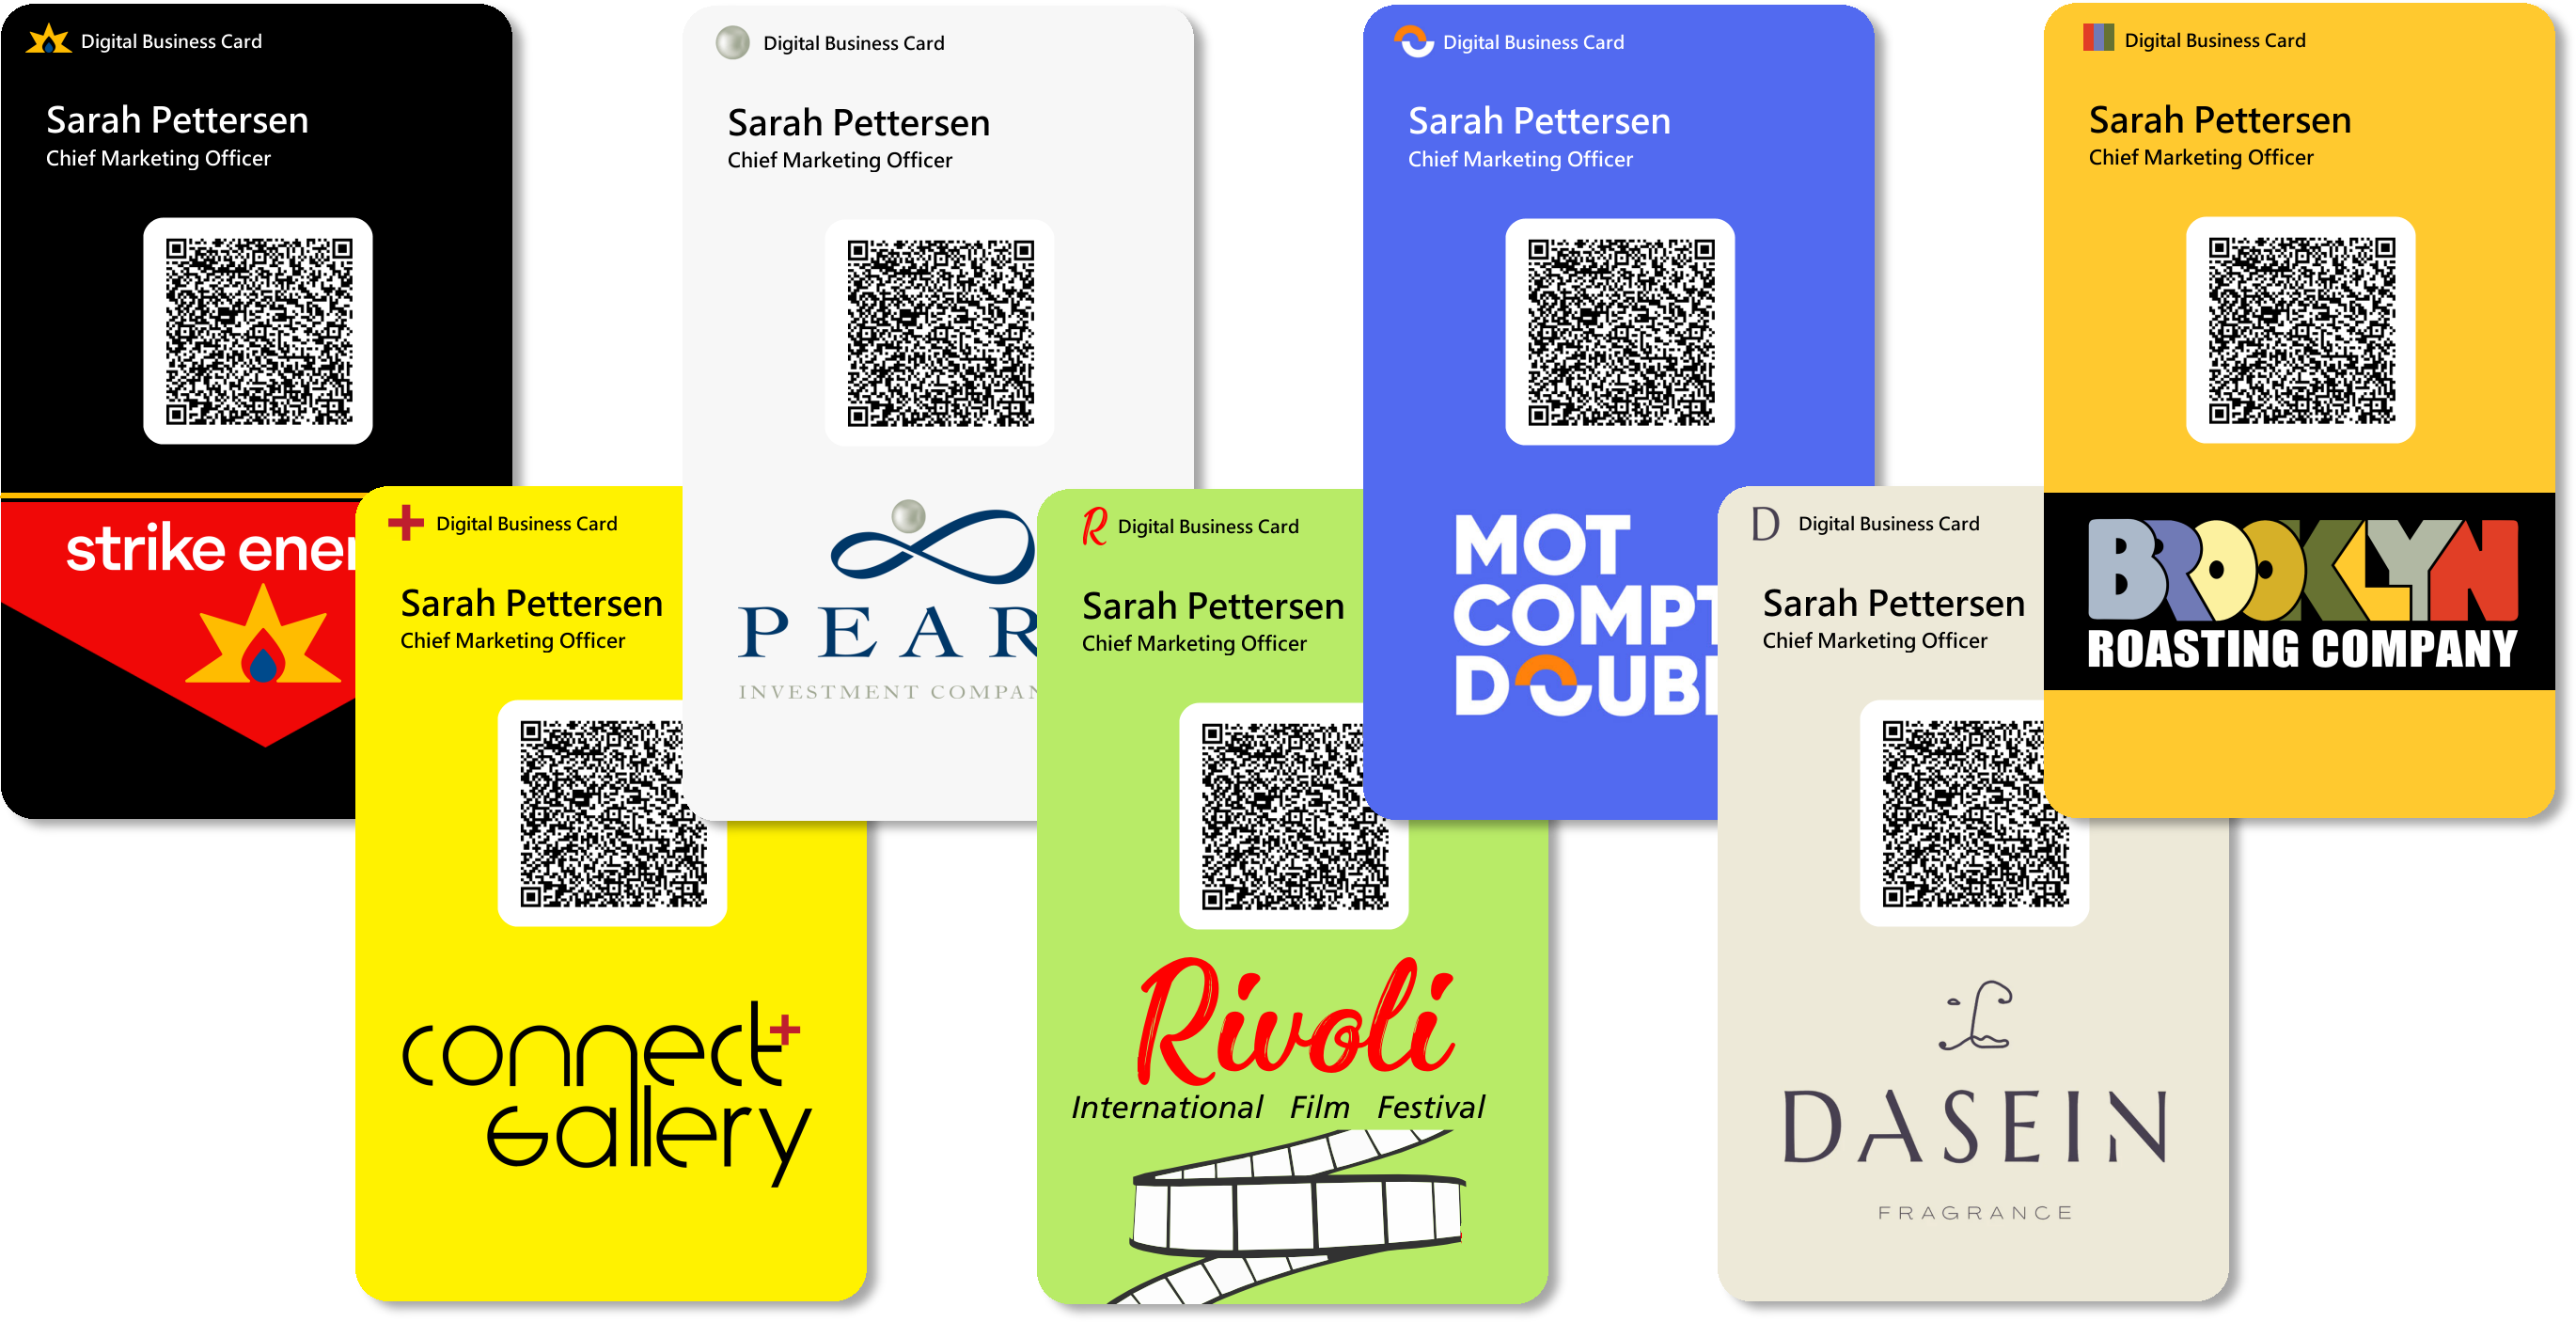
Overview
The Dynasend Digital Business Card is synced to your email signature data. The card is saved to your phone's wallet, and shared via photo. This simple process eliminates the need for connectivity, enabling the functionality any place, any time.
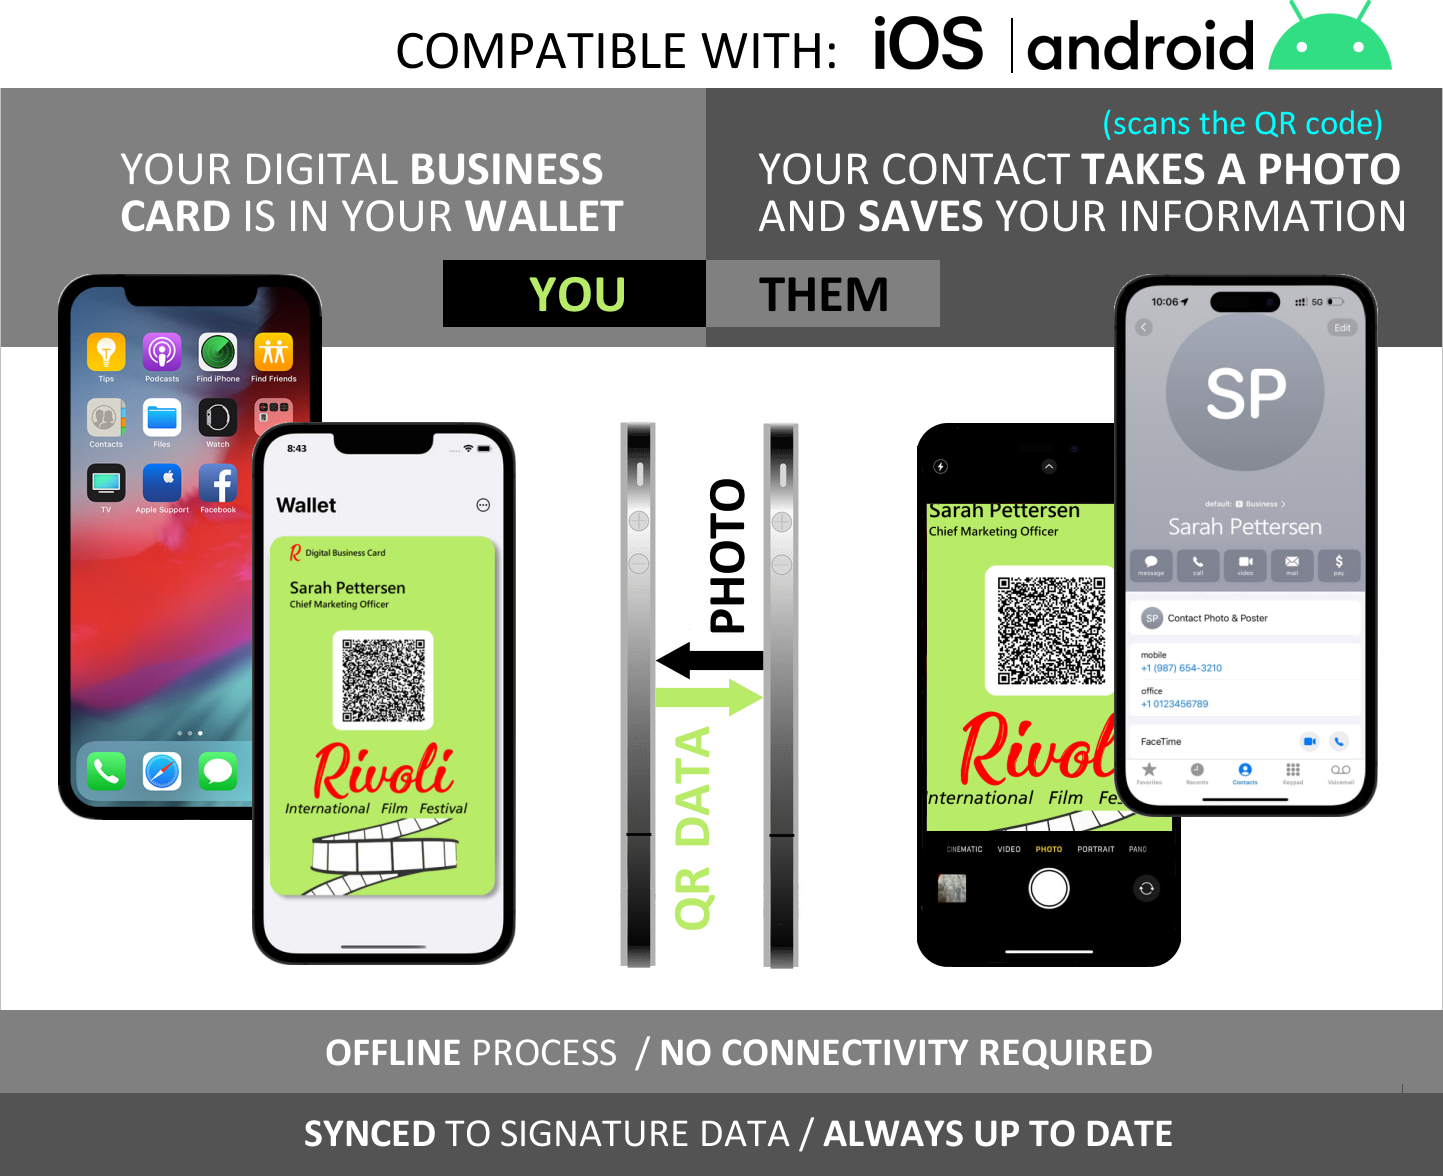
Benefits of going digital:
- always up to date
- no more printing / reprinting
- save money
- environmentally friendly
- always on hand
- secure (no sending employee lists to printers)
- impressive, leading edge, technology
The Dynasend digital business card feature is included with our email signature service, so there's nothing more you need to purchase.
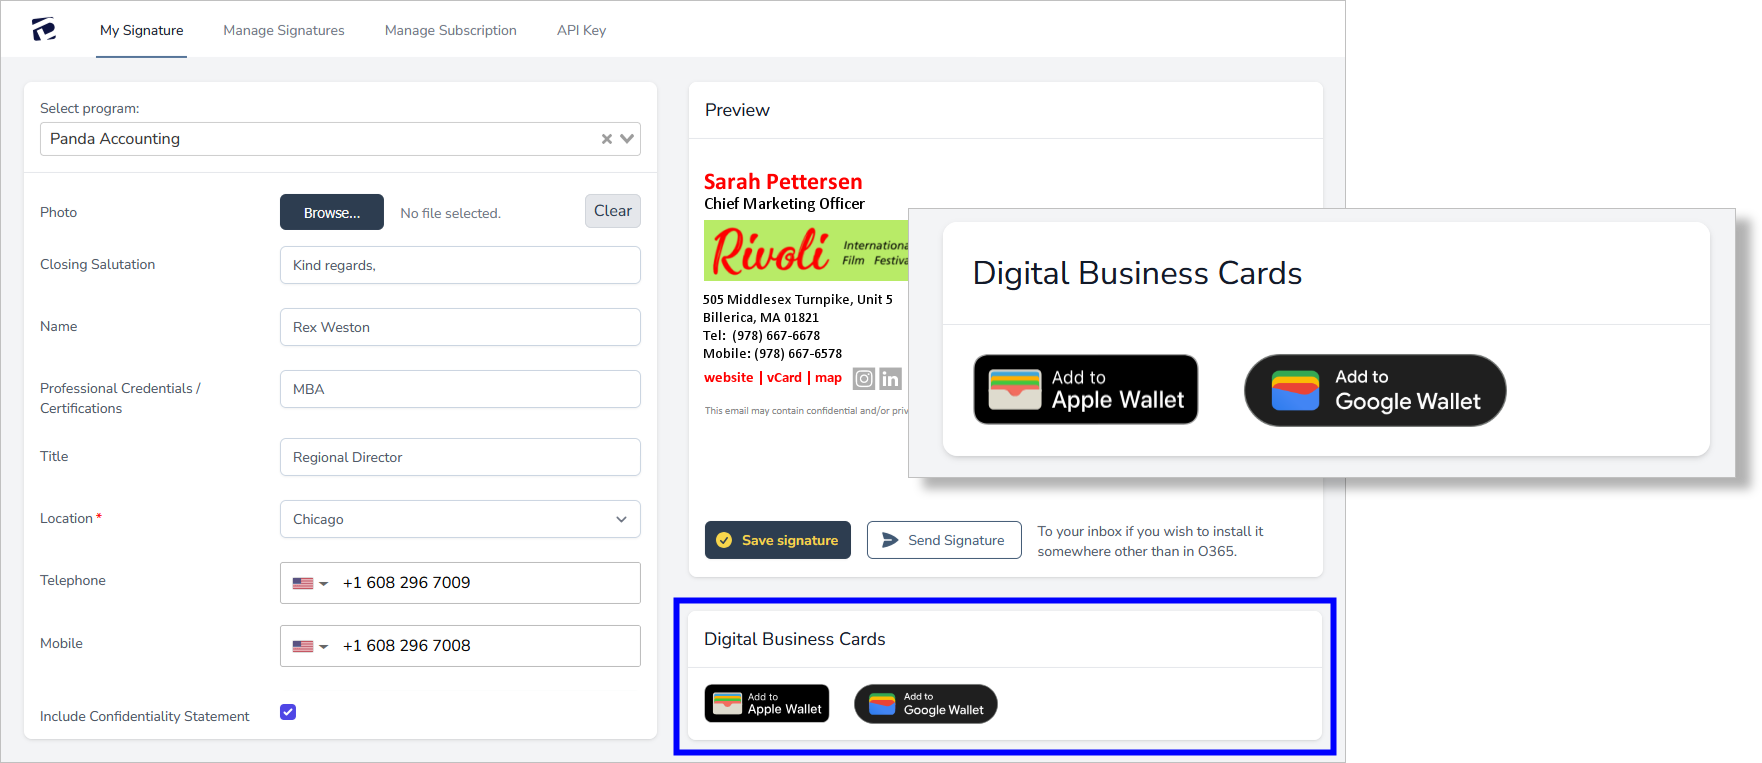
Once the your digital business cards (wallet passes) have been set up, they will be available for installation by your users from the Dynasend user portal:
Digital Business Cards - Graphics Specifications and Setup Instructions

If you are a Dynasend customer and would like to add the digital business card feature to your program, we ask that you provide us with the following:
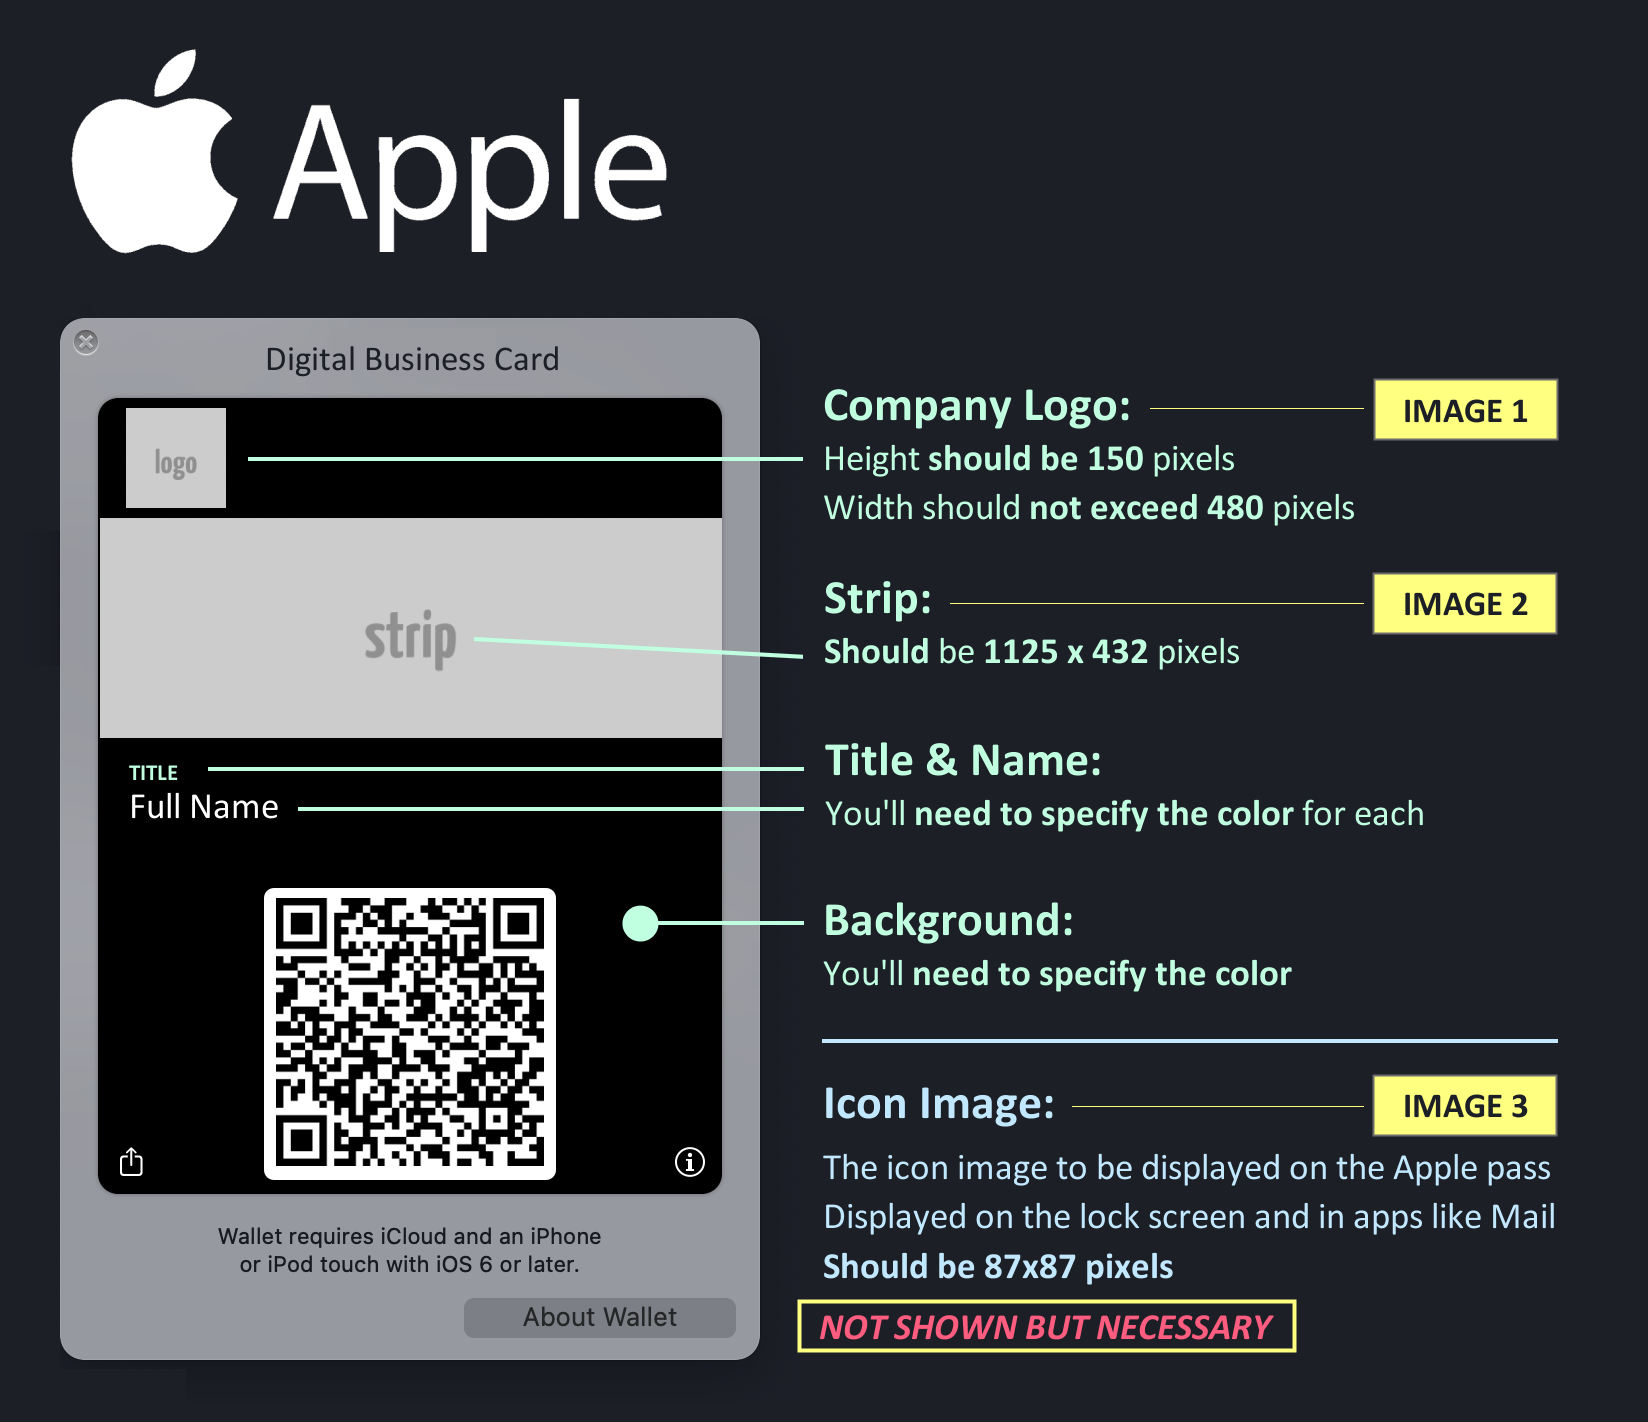
- five separate graphic files (specifications are below)
- three color selections (explanation is below in the Apple section)
You can email us here (attach the requested files please) and we will get this set up for you.
Note: If you don't like the look of the cards after we get them set up, just send us revised files and we will update them for you. Everything is fully synced, so updates will deploy to your users automatically.
Logo Image for Android
| Guideline | Description |
|---|---|
| Preferred file type | PNG |
| Minimum size | 660 px by 660 px |
| Image aspect ratio | 1:1 |
| Artwork aspect ratio | 1:1 |
| Actual pixel size | Scale to device size |
| Logo circular | Your logo is masked to fit within a circular design. Ensure that your logo fits within the Safe Area. Don't pre-mask your logo. Leave the logo in a square with a full bleed background color. The logo needs to have a 15% margin so that it isn't cut off when masked. |

Google's logo image documentation can be found here.
Hero Image for Android
| Guideline | Description |
|---|---|
| Preferred file type | PNG |
| Recommended size | 1032x336 px Use wide, rectangular images. Use an image with a colored background for best results. |
| Recommended shape | Use wide, rectangular images. |
| Recommended color | Use an image with a colored background for best results. |
| Aspect ratio | 3:1 or wider |
| Display size | The full width of the card and proportional height. |

Google's hero image documentation can be found here.
User Installation
Upon completion your digital business cards (wallet passes) will be activated and available for installation by your users.
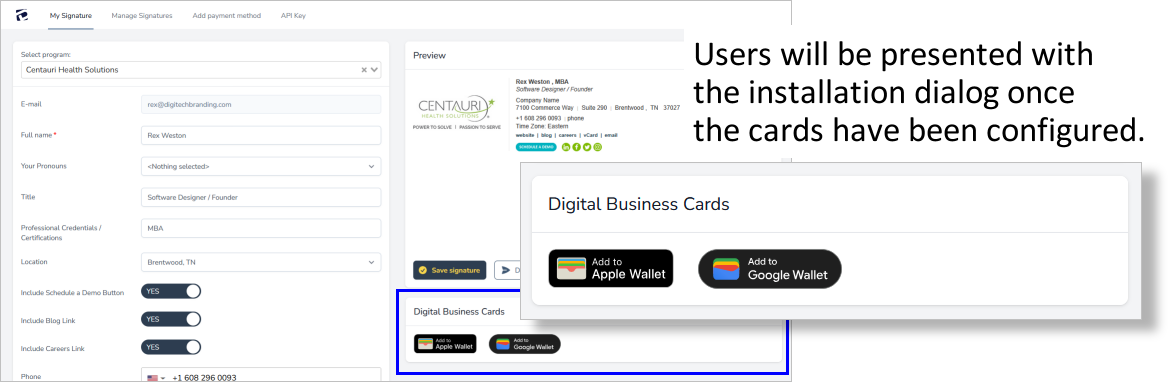
Digital Business Card Setup
To fully configure your digital business cards (wallet passes) you will need to do all of the following:
- create and upload five separate graphic files (specifications are above)
- select three colors (explanation is above)
- map your program's fields to a vCard - instructions are found here
Upon completion of these steps your digital business cards (wallet passes) will be activated and available for installation by your users.
Navigate as shown here:

Upload your prepared images and set your colors on this page:
Note: Everything is live, so any changes you need to make after your first attempt will automatically sync to all existing digital business cards.

The business cards will be live for all users as soon as "Create Program Wallet Pass Mapping" is clicked.
Related docs
Click Tracking
Click Tracking lets you measure how recipients engage with your email signatures. Once enabled, Dynasend records clicks on the links in your signatures and banners, and optionally impressions (how often your signatures are viewed), and presents the results in an analytics dashboard in the Manager's Dashboard.
1. What does Click Tracking measure?
Click Tracking captures two kinds of engagement:
- Clicks — every time a recipient clicks a web link in a signature or banner (including banner images, social media icons, and links in your signature content).
- Impressions — how often your signatures are viewed by recipients (measured when the signature's images are loaded).
Automated traffic from email security scanners and link-checking bots is identified and separated out, so the numbers you see reflect genuine human engagement. Only web links (http / https) are tracked — mailto: and telephone links are not.
2. How do I enable Click Tracking?
Click Tracking is controlled from your account settings in the Manager's Dashboard. There are two independent toggles:
- Click tracking — records clicks on signature and banner links.
- Impression tracking — records signature views.
You can enable either or both. Changes roll out to your published signatures automatically — there is nothing to re-publish and nothing for your users to do.
Account settings screen showing the Click Tracking and Impression Tracking toggles.
3. Which deployments support Click Tracking?
Click Tracking is currently supported on:
- Outlook add-in deployments
- Mail Flow (gateway) deployments
Google Workspace / Gmail deployments are not supported yet.
4. How do I view my analytics?
Open the Click Tracking dashboard from the Manager's Dashboard. At the top you'll find summary cards giving you an at-a-glance view of total clicks, impressions, and engagement over your selected date range, with filters for program, signature, and banner.
Click Tracking dashboard summary cards with the date-range and program filters visible.
5. How does the activity timeline work?
The timeline chart shows your click and impression activity day by day, so you can spot trends and see the impact of a new banner or campaign.
Activity timeline chart showing daily clicks and impressions.
6. What does the geography map show?
The map shows where in the world your clicks are coming from. Locations are approximate — they are based on the network the recipient is connecting from, so treat them as a regional guide rather than a precise address.
Geography map with click activity by country.
7. How do I see which links are performing best?
The links table lists every tracked link across your signatures and banners, with its click counts. The table distinguishes total clicks from human-probable clicks: email security tools routinely open links to scan them for threats, and those automated clicks are filtered into the total column so they don't inflate your real engagement numbers. The human-probable column is the one that reflects genuine recipient interest.
Click any row to drill down into a link's detail page, which shows the individual signatures using that link and a daily click timeline for it.
Links table showing total vs. human-probable clicks, and the link detail drill-down page.
8. Why do the links in my signature look different?
When Click Tracking is enabled, the web links in your signatures are routed through a Dynasend measurement address — trk-us.dsend.co or trk-eu.dsend.co, depending on your account's region. When a recipient clicks a link they are taken straight to the original destination; the measurement address simply records the click along the way. Hovering over a link in a received email will show the measurement address rather than the destination URL.
9. What data is collected about email recipients?
Click Tracking is designed for aggregate analytics, not individual profiling:
- No personal profiles of your email recipients are built or stored.
- Automated scanner and bot traffic is identified and filtered out of your engagement numbers.
- Geographic data is approximate, based on network location — it is a regional indication, not a precise location.
Adding CSAT / Surveys to Your Signatures
Keep in mind that a single user can be a member of three distinct categories: a program / a location / a user group.
Because CSAT / surveys can be assigned to each of these three categories, it can quickly become confusing at a user level, as the CSAT / survey assignment to one category may supersede the CSAT / survey assignment in another category, leaving you wondering why a particular user has (or does not have) a particular CSAT / survey.
Our suggestion as to how to avoid this confusion is to identify the category that best meets your needs and then stick to this single category when assigning CSAT / surveys. If you only assign CSAT / surveys to programs, or only to locations, or only to user groups, it will be much easier to understand what's happening.
Dynasend's CSAT feature is probably the least well tested feature available. We have no reason to think that it will not work, but we do not have tangible evidence that it will. We recommend that you do your own testing of this feature should you elect to use it.
1. Where will my CSAT / Survey appear in my signatures?
The CSAT / survey can appear above, within, or below the rest of your signature content. By design, the CSAT / survey's placement is pre-set as illustrated in this graphic:

If you wish to have the CSAT / survey appear in a different place within your signature, just ask and we'll adjust your HTML code to position it differently.
2. How do I configure my CSAT / Survey?
CSAT / surveys are configured and used in roughly the same was a banners - these graphics illustrate the process:


3. What does an email recipient see after clicking on a rating?
After clicking a rating, the person doing the rating will be taken to a landing page allowing them to submit further feedback if they want to:

4. How do I access the data received for analysis?
You'll find your data under "Ratings":

Clicking the "eye" icon will take you to the details page for any particular rating, where you can see any optional information that was provided by the rater:

5. I added a CSAT / Survey but it's not showing up in my signatures - what should I do?
Because CSAT / surveys were added after many programs were live, the code required for the CSAT / survey was not in the signature HTML. We attempted to add it everywhere by using an automated search & replace script, but it may have missed a few files. If it's not showing up for you, this may be what has happened. Please email us to let us know and we will investigate.
6. How can I download my data into a spreadsheet for further analysis?
By using the three dot menu from within the configurations page you can download a CSV file of your ratings for further analysis.

7. What's the difference between CSAT and Surveys?
CSAT (customer satisfaction) is generally a measure of a specific employee's interactions with a customer. As a result, data is typically analyzed at the level of a single employee. For instance:
- Rex Weston: Average rating 4.65
- Nathan Long: Average rating 4.80
- Gil Lopez: Average rating 4.75
Survey data generally is analyzed in the aggregate. For example:
Would you be likely to participate in a quarterly webinar about market trends?
- Aggregated data (Rex, Nathan, Gil, etc.): Average rating 3.85
To accommodate for either of these situations, the data collected contains the email address of the message sender, allowing for data analysis at the individual employee level if desired:

8. Can I use icons for my ratings, like smiley's or stars?
Custom rating icons (for example, smileys or stars) are on our roadmap. Contact support for availability and timelines.
Open API Initiative
Our Open API specification follows formal standards for describing HTTP APIs, facilitating an understanding of how our API's work.
